On Leave means the client's status is still admitted, but they are away from the facility with permission.
Use these procedures to manage a client's on leave setting.
Change a Client's On Leave Setting
The client must be admitted to a bed with a status of Occupied or Scheduled On Leave before you can put the client On Leave.
Follow this path: My Office tab > Inpatient/Residential banner > Bedboard sub-banner.
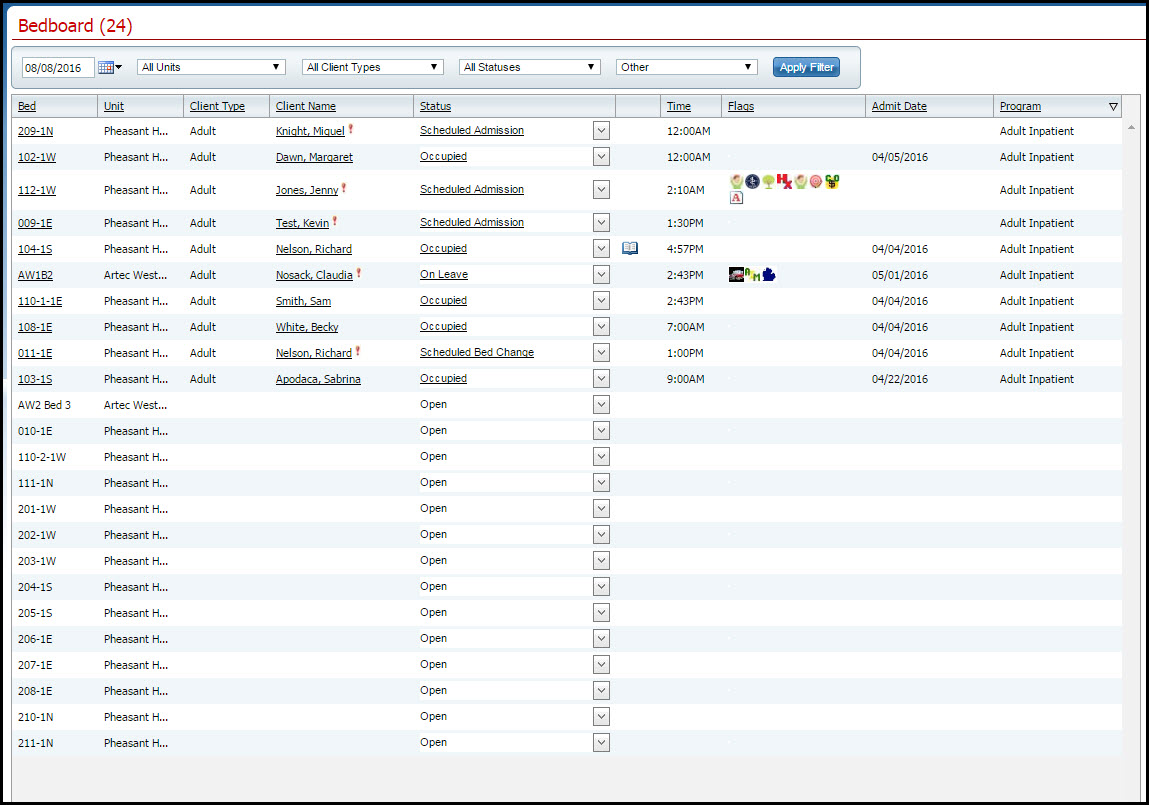
The Bedboard (###) list page is displayed. View field definitions.
Filter the list to determine the records that are displayed. Tell me how...
Find the client who you want to set on leave. Tell me how...
Click the drop down arrow in the Status column of the client you want to set on leave and select On Leave.
The Census Management - On Leave page is displayed. View field definitions.
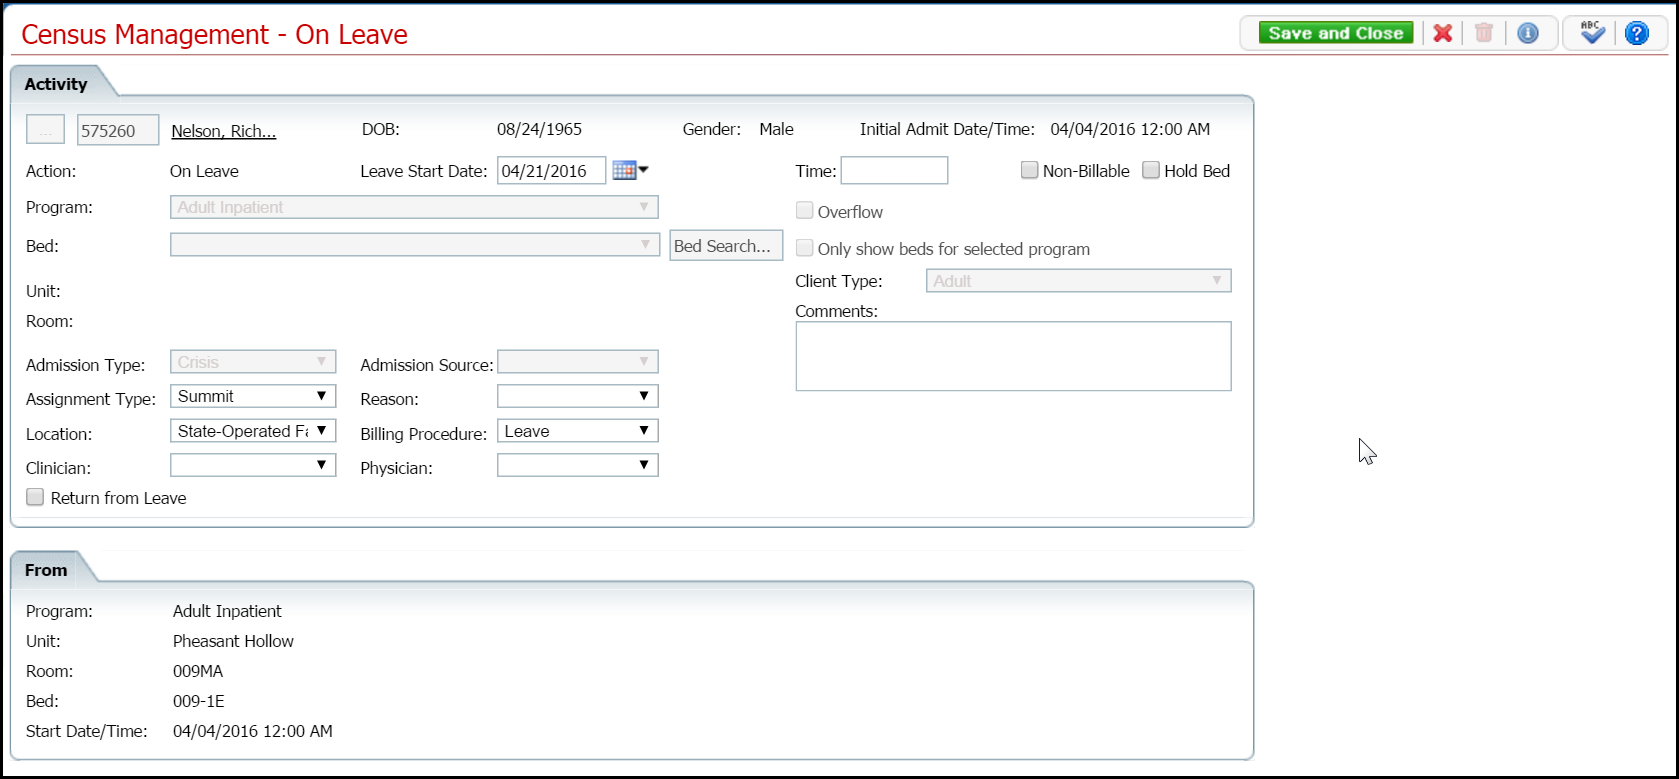
Complete the required and necessary fields on the Census Management - On Leave page.
When the page is complete, click the Save and Close button in the toolbar.
The Bedboard list page is displayed. A second record for the client is displayed with the Status of On Leave.
To change an on leave setting, you can change the:
Return from Leave
Schedule Return from Leave
Discharge
Follow this path: My Office tab > Inpatient/Residential banner > Bedboard sub-banner.
The Bedboard (###) list page is displayed. View field definitions.
Filter the list to determine the records that are displayed. Tell me how...
Find the client whose on leave setting you want to change. Tell me how...
Click the On Leave hyperlink in the Status column for the client.
The Inpatient Activity Details page is displayed with the Activity Details tab active. View field definitions.
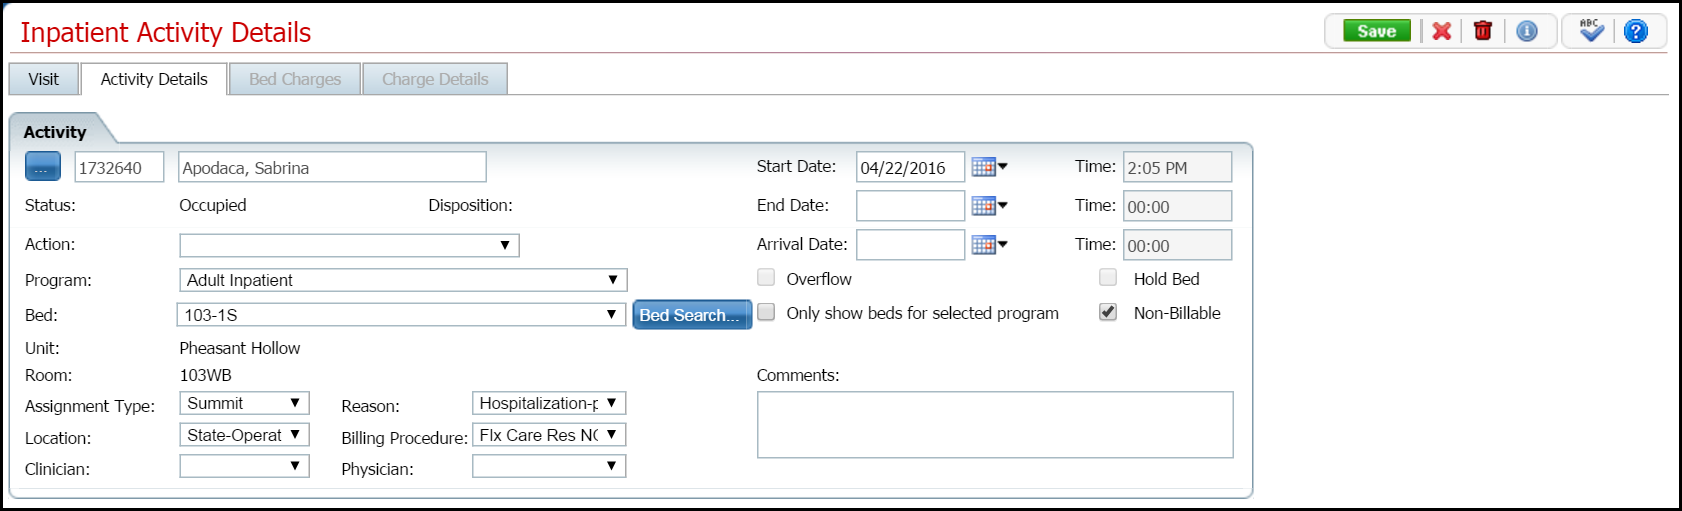
Complete the fields on the Inpatient Activity Details page.
· Change the Start Date and End Date
· Change or add one of the following Actions:
Bed Change - use this procedure starting with step 4.
Transfer - use this procedure starting with step 5.
On Leave - use this procedure starting with step 5.
Discharge - use this procedure starting with step 5.
Schedule Bed Change - use this procedure starting with step 5.
Schedule Transfer - use this procedure starting with step 5.
Schedule On Leave - use this procedure starting with step 5.
When the page is complete, click the Save button in the task bar.
Click the Exit ![]() toolbar item to return to the Bedboard
page.
toolbar item to return to the Bedboard
page.
If you have put a client On Leave in error, you can delete the On Leave setting.
Follow this path: My Office tab > Inpatient/Residential banner > Bedboard sub-banner.
The Bedboard (###) list page is displayed. View field definitions.
Filter the list to determine the records that are displayed. Tell me how...
Find the client whose on leave setting you want to change. Tell me how...
Click the On Leave hyperlink in the Status column for the client.
The Inpatient Activity Details page is displayed with the Activity Details tab active.
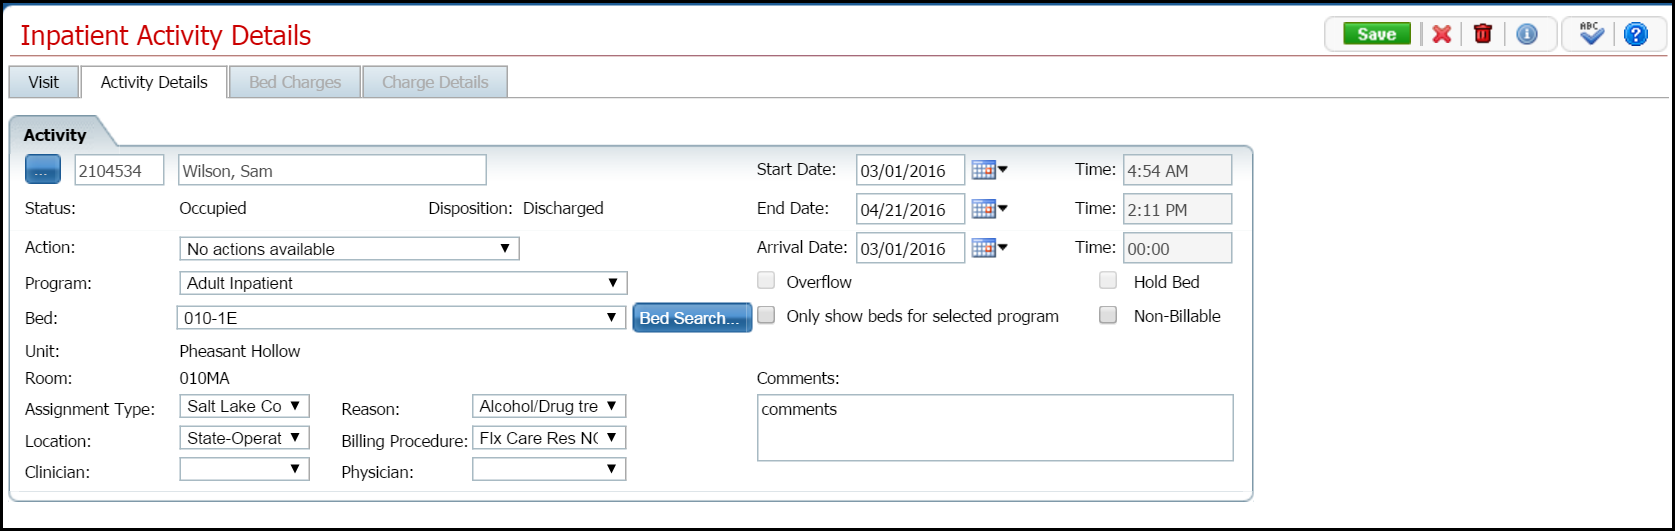
Click the trash can
![]() toolbar item in the toolbar.
toolbar item in the toolbar.
The Confirmation Message window is displayed.
In the Confirmation Message window, click the Yes button.
The Bedboard page is displayed. The client's status is displayed as Occupied. The client record with a status of On Leave is no longer displayed.
Why can't I access these screens?