In SmartCare payments and adjustments, a refund is a payment on an account that overpays a claim line or the account.
When you post a payment and notice that the payment amount is higher than the charge, you can post only the charge amount to the claim line and enter the remaining amount on the account as a refund.
There are different ways to enter an overpayment to an account:
Post the payment and enter the overpayment separately
Post the overpayment to the charge line, then enter the refund amount
Post the Payment and Overpayment Separately
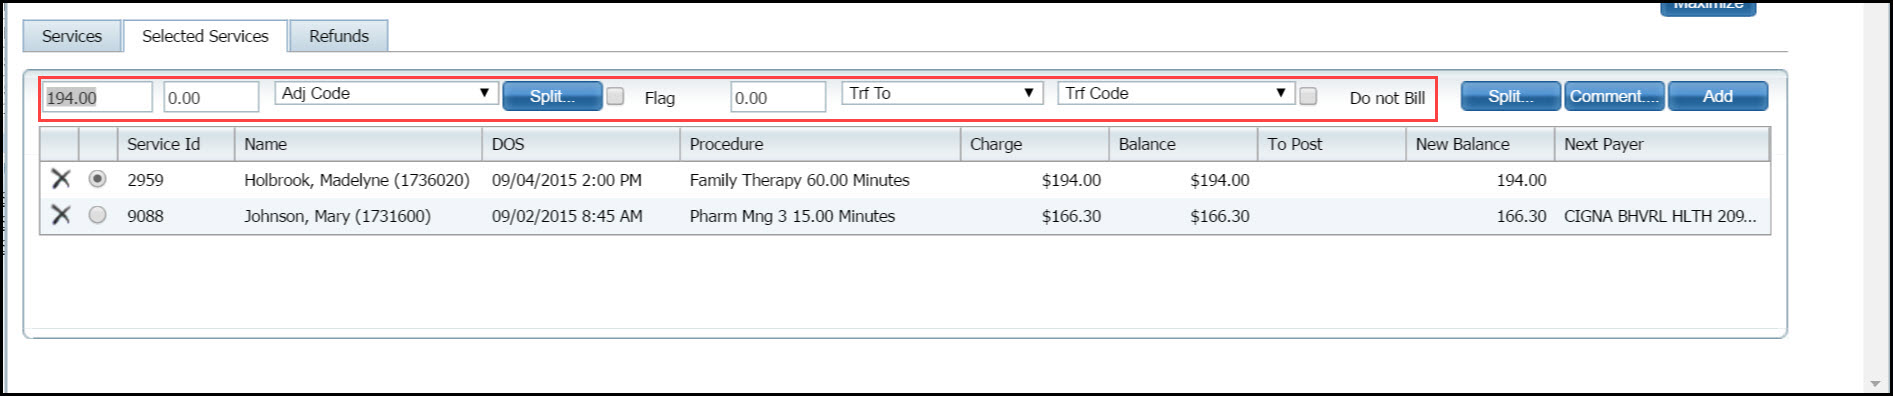
Apply the payment using the fields displayed just above the list of client records. Refer to the red box in the figure below.
The payment amount is the first field on the left. Notice that the total charge amount is displayed in the field for the client record that is selected in the list panel below.
To pay a different amount, type the payment amount in the field.
To apply an overpayment, type the amount to pay the charge in the first field and click the Add button.
Click the Refund tab.
Type the overpayment amount in the Amount($) field.
Select the Refund type from the drop down list.
Use the calendar icon to identify the date of the payment.
Type a comment, if desired.
Click the insert button.
Note that the dollar amount is listed in the Refund field in the payment line above.
To apply a single adjustment, type the dollar amount of the adjustment in the second field, just to the right of the payment amount. Select an adjustment code that describes the adjustment from the drop down.
To apply multiple adjustments with different adjustment codes, click the Split button. Tell me how... See the red box in the figure below.
![]()
To transfer an amount to a single payer, select the payer to transfer the amount to from the Trf To drop down. Use this step if the client has more than one coverage plan to bill a secondary insurance or to the client. For example, if the balance is the client's responsibility such as deductible or co-pay.
To transfer the balance due to several payers, click the Split button (next to the Comment button). Tell me how... Refer to the red box in the figure below.
![]()
To enter a comment on the payment or adjustment, click the Comment button. Tell me how... Notice the red box in the figure below.
![]()
When you have entered all the information for the service line, click the Add button. The information is saved and the next service line is selected.
When you have entered the entire payment amount or you want to leave the page before you are finished, click the Update button at the top of the page.
The information on all the fields you entered is saved in the system and the service line(s) is displayed on the Services tab.
The Confirmation Message window is displayed.
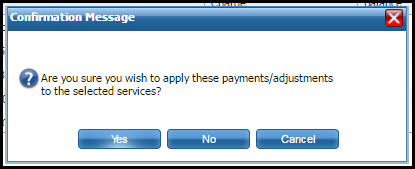
Click the Yes button in the Confirmation Message window.
To e