Use this task to admit a client to a bed in a unit. This topic explains how to:
Admit a Client with a Scheduled Admission
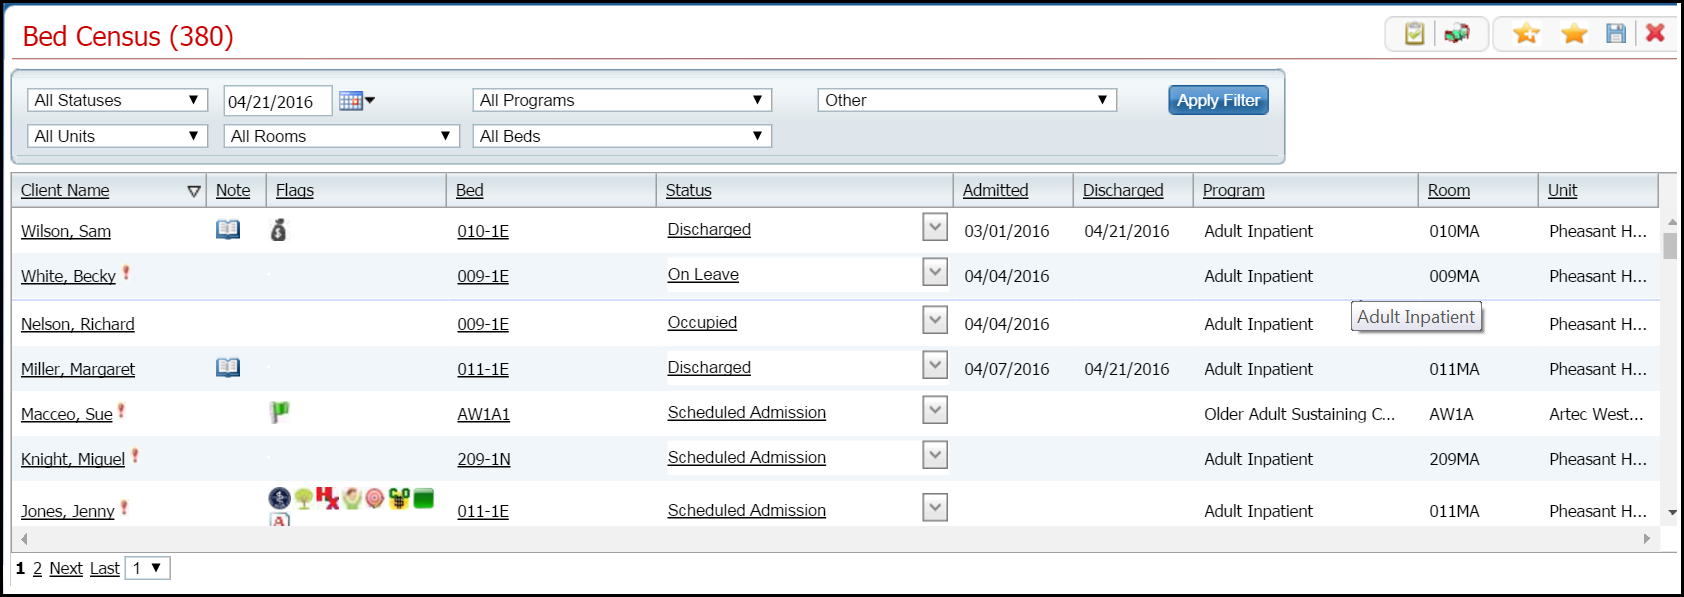
Follow this path: My Office tab > Inpatient/Residential banner > Bedboard sub-banner to display the Bedboard list page.
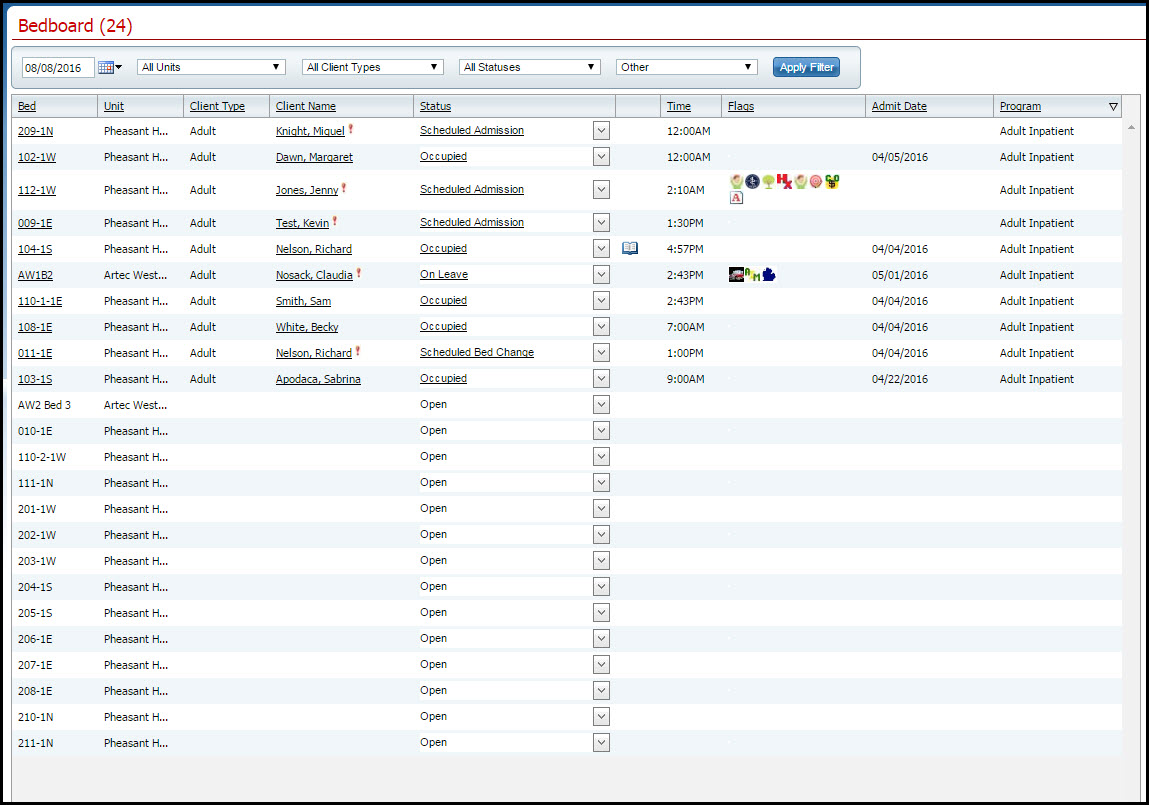
The Bedboard list page is displayed. View field definitions.
Filter the list to determine the records that are displayed. Tell me how...
Find a bed with a status of Open. Tell me how...
Click the drop down arrow in the Status column of the open bed you want to admit the client to and select Admit.
If a message window is displayed, this means a client account is open who is currently admitted to the facility. Notice the second tab in the menu tabs.
a. Answer the prompt in the message window.
b. To admit a different client than is showing on the tab bar, select the Open Client Search option . Or to continue working with the currently open client account, select the Open Inpatient Visit Activity for client that is already admitted option.
c. Click the OK button.
-or-
If no message window is displayed the Client Search window appears. Continue with step 6.
The Client Search window is displayed. View field definitions.
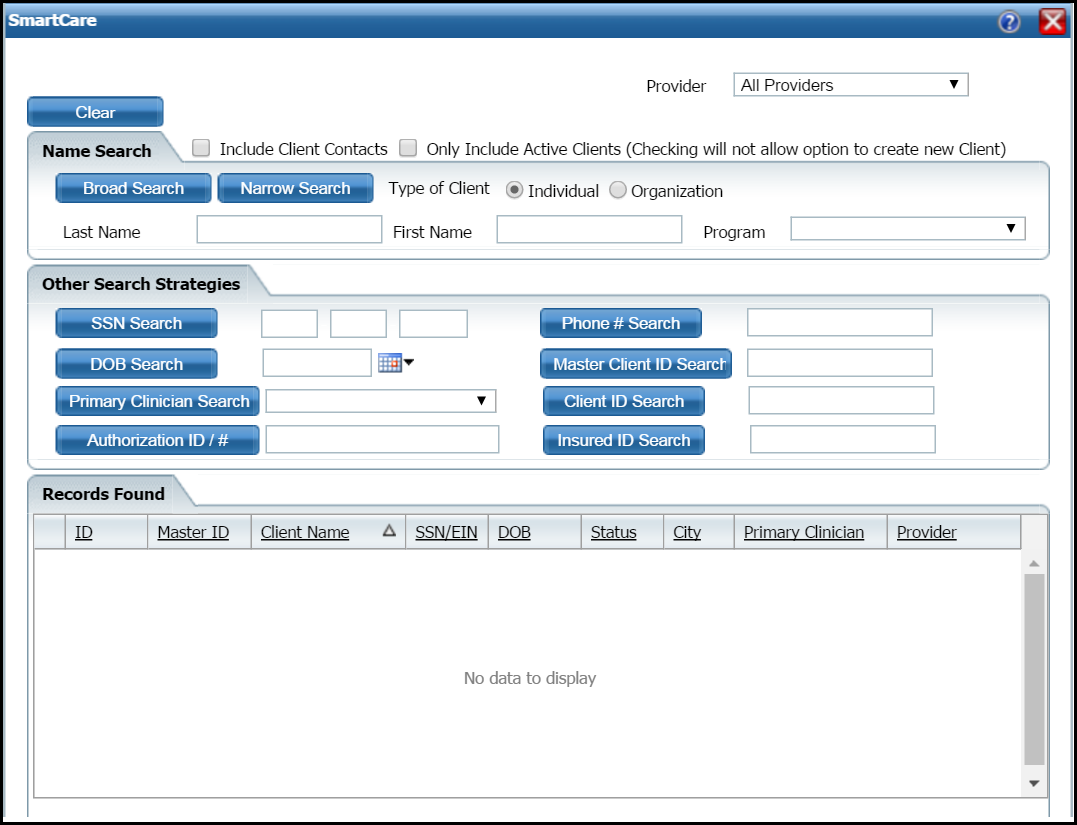
Search for the client. Tell me how...
When you find the client, select the line and click the Select button.
The Census Management - Admit page is displayed. View field definitions.
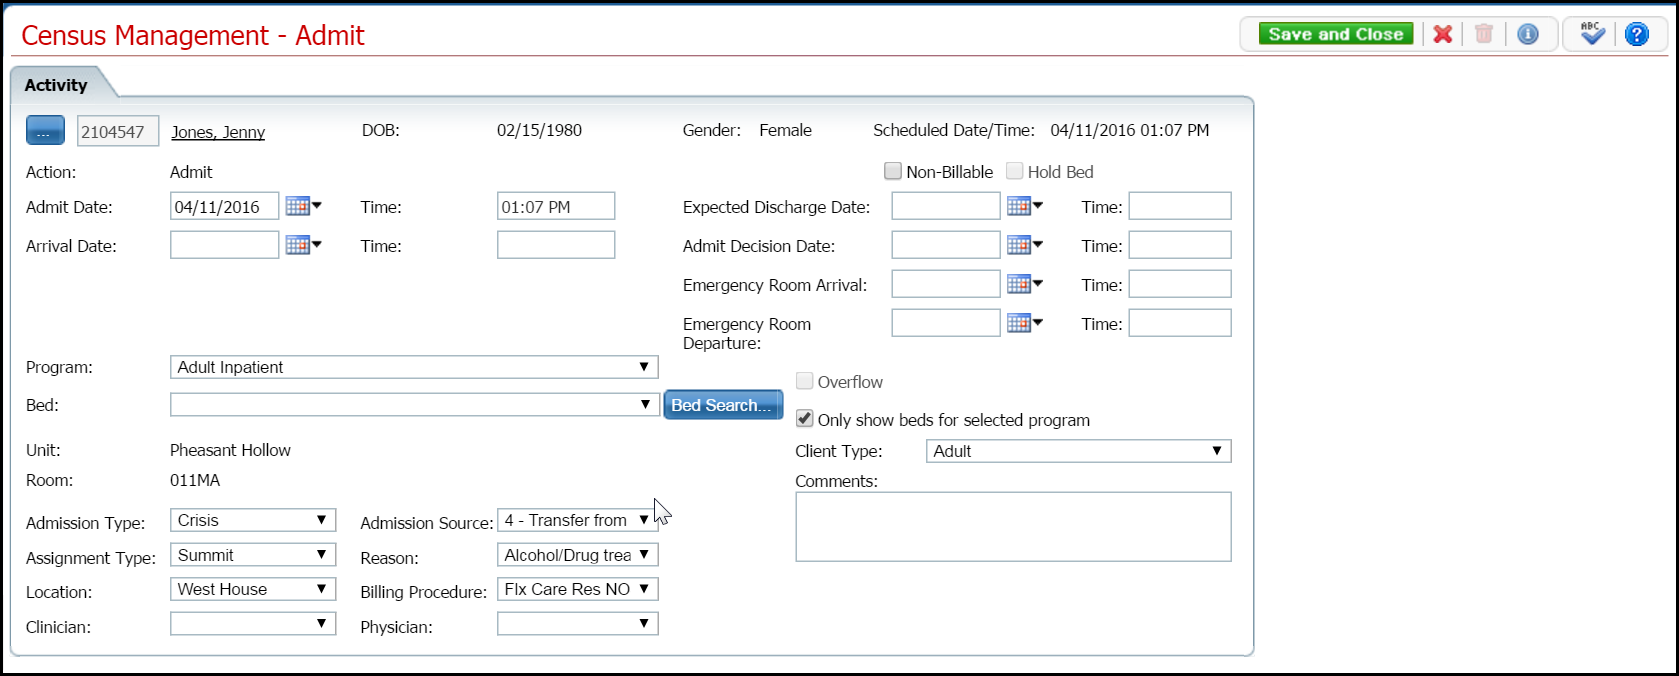
Complete the required and necessary fields on the Census Management - Admit page.
When the page is complete, click the Save and Close button in the task bar.
Follow this path: My Office tab > Inpatient/Residential banner > Bedboard sub-banner to display the Bedboard list page.
The Bedboard list page is displayed. View field definitions.
Filter the list to determine the records that are displayed. Tell me how...
Find the client whose admission you want to change.
Click on the hyperlinked status in the Status column.
The Inpatient Activity Details page is displayed with the Activity Details tab active. View field definitions.
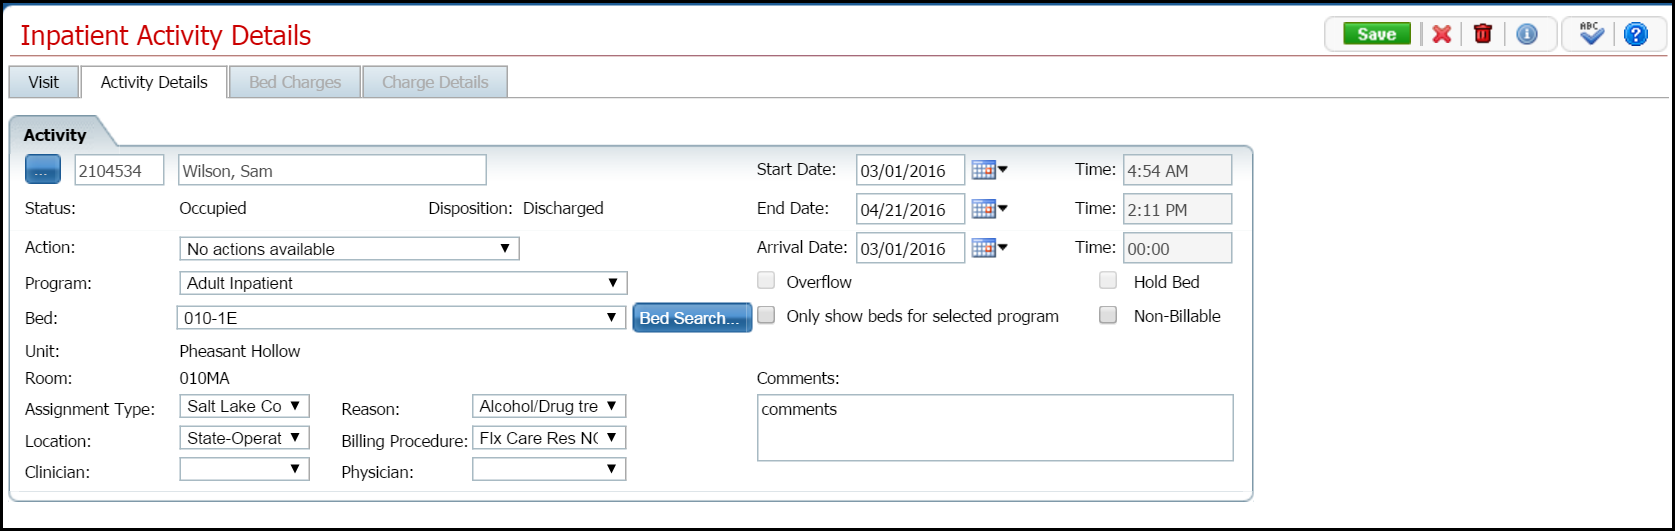
Complete the required and necessary fields on the Inpatient Activity Details page Activity Details tab to make any changes. View field definitions.
When the page is complete, click the Save button in the task bar.
Click the Exit ![]() toolbar item to close the window.
toolbar item to close the window.
The Bedboard page is displayed. The client's name is listed on the Bedboard page for the bed that was assigned with a Status of Occupied.
Use this task to delete an admission.
Note: Take care when deleting data, especially if it has been used on services and billing charges in the system. Deleting existing data can cause problems with the existing records and history. Rather than deleting, you can mark the record as Inactive.
Follow this path: My Office tab > Inpatient/Residential banner > Bedboard sub-banner to display the Bedboard (####) list page.
The Bedboard (###) List Page is displayed. View field definitions.
Filter the list to determine the records that are displayed. Tell me how...
Find the client and bed whose admission you want to delete. Tell me how...
Click the hyperlinked status (typically, it will say Occupied in the Status column for the client's admission you need to delete.
The Inpatient Activity Details page is displayed with the Activity Details tab active. View field definitions.
Click the trash can
![]() toolbar item to delete the admission.
toolbar item to delete the admission.
The Message Confirmation window is displayed.
Click the Yes button in the Message Confirmation window.
The Bedboard list page is displayed. The client whose admission you deleted is no longer listed. The bed now shows a status of Open.
Why can't I access these screens?